How to deploy self-hold password manager
Why Vaultwarden?
I think there is no need to highlight the importance of a self-hold password manager to replace cloud server password manager such as Chrome’s remember your word.
It is widely accepted that bitwarden is a famous and open-source software for password. Nonetheless, holding the official version wring in C# may bring huge pressure on my VPS as wiki says 4G ram is recommended. Considering my 2C2G VPS, I choose another project–Vaultwarden, the leading role of this article. Vaultwarden is rewriten in rust and very light-weight. It only takes 30M memory running as docker container.
How to install?
Download and run docker container
1
docker run -d --name vaultwarden -v /vw-data/:/data/ --restart unless-stopped -p 3000:80 -e DOMAIN=https://your_domain -e SIGNUPS_ALLOWED=false -e SMTP_HOST=your_mail_server_domain -e SMTP_FROM=your_mail_address -e SMTP_PORT=587 -e SMTP_SECURITY=starttls -e SMTP_USERNAME=your_mail_username -e SMTP_PASSWORD=your_mail_password vaultwarden/server:latest
PS: Maybe you need to set SIGNUPS_ALLOWED=true to signup your own account and then deploy it again with SIGNUPS_ALLOWED=false. At first I just use 465 port as my SMTP send port. But starttls protocol need 587 port.
Configure nginx reverse proxy and request SSL certificate.
1
2
sudo certbot certonly --nginx -d your_domain
vim /etc/nginx/sites-available/00-default-ssl.conf1
2
3
4
5
6
7
8
9
10
11
12
13
14
15
16
17
18
19server {
listen 443 ssl http2;
listen [::]:443 ssl http2;
ssl_certificate /etc/letsencrypt/live/vaultwarden.bbb.enterprises/fullchain.pem;
ssl_certificate_key /etc/letsencrypt/live/vaultwarden.bbb.enterprises/privkey.pem;
server_name vaultwarden.bbb.enterprises;
client_max_body_size 525M;
location / {
proxy_set_header Upgrade $http_upgrade;
proxy_http_version 1.1;
proxy_set_header Host $host;
proxy_set_header X-Forwarded-For $proxy_add_x_forwarded_for;
proxy_set_header X-Real-IP $remote_addr;
proxy_buffers 8 16k;
proxy_buffer_size 32k;
proxy_set_header X-Forwarded-Proto $scheme;
proxy_pass http://localhost:3000/;
}
}PS: It is so long as I want to use feature “login with device”. Unfortunately, I failed and joined an discussion.
Go to bitwarden official website. Install the desktop app for your Mac or PC. Install the web extension and mobile app.
In here, I just want to show the installation in android. Due to the missing of Google Service in my HUAWEI cellphone, I need to install Bitwarden using F-Droid.
First of all, go to the official website, download and install F-Droid app.
Secondly, add the url and fingerprint from bitwarden official website. Then go to category and pull down to refresh the source.
At last, download and use Bitwarden mobile app.
PS: According the announcement from bitwarden official website, there is a limitation: Since the Bitwarden F-Droid build does not include Firebase Messaging, push notifications for live sync updates of your vault will not work. Manual vault syncing is required. Though I do not know why this version is special, it is recommended that download the app from Google Play or IOS App Store in order to get a better experience.
Usage tips on mobile app
How to import saved password from Chrome
I used to apply Chrome auto save feature to save my password for a long time, so there are more than 200 passwords in there. It is not convenient to import them to Vaultwarden manually. So Bitwarden official offers an instruction, just open and follow it if you want to. And go to Chrome privacy page in which you can delete all saved password quickly in Chrome. Remember that you should delete your exported password file as soon as possible for safety concerning.
Open all permission about auto fill
Sometimes it will turn off automatically, so you’d better to have a double check. And it is recommended to open all launch permission to get a superior experience.
How to handle if there is no auto fill login to choose
Solution one: Click add button to add a new one
Solution two: Click serch button and find the one you want to fill in, and choose auto-fill and save.
PS:Due to security consideration, the app does not allow user to capture the screen, so I can not put screenshot here to help reader get a better understanding.
The reason why these can solve the problem is that: the app need URIs to detect the app you are using which needs auto fill. Each of two solution can add app URIs to the login item. As these password are imported from Chrome, they do not have app URIs.
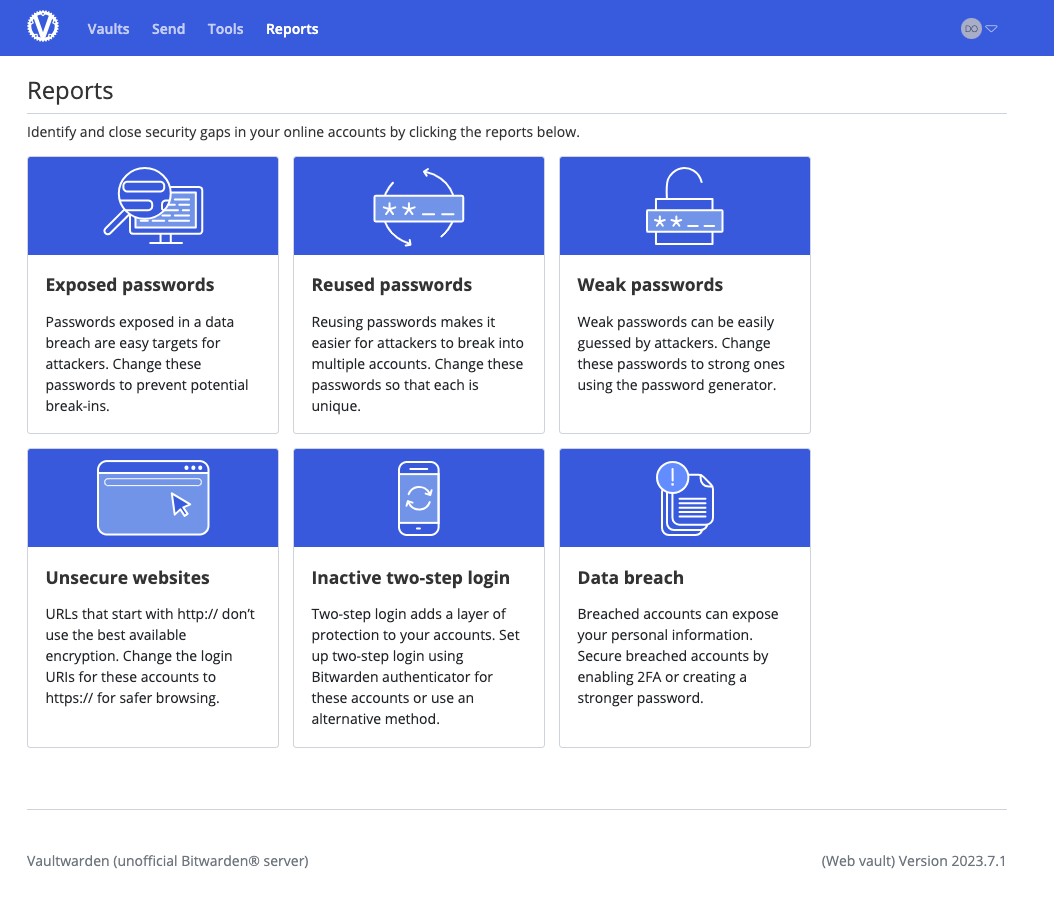
Powerful reports feature
Go to the wab page and you will find a lot of useful report to help you build a safety password system.