How to deploy this blog use CI CD in Gitea
As I said before, I need to migrate all service from RN to Ali cloud. Before this blog is using git hook to achieve automatization. Now I want to try to use Gitea Action, a new and more powerful tool, to do automatization. Also, you will learn how to migrate blog between two server.
Migrate your repo from old Gitea to new Gitea
Use your local terminal and switch work path as blog git repo directory.
1 | vim .git/config #replace the remote url of repo |
1 | [remote "origin"] |
Enable Action in Gitea
Log in your Gitea server as root.
1 | vim /etc/gitea/app.ini |
1 | #add following at the end of app.ini |
1 | service gitea restart |
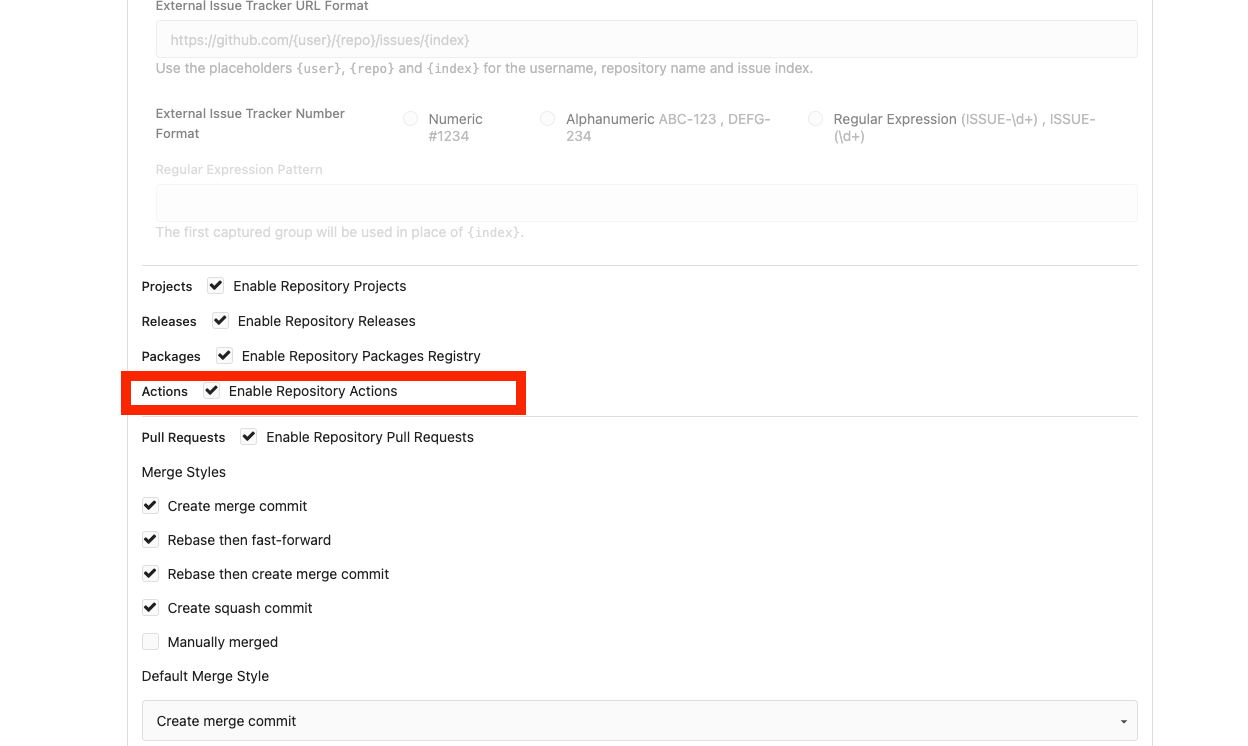
Then go to your repo web page, click settings and enable action for your repo.
Install Action runner for Gitea
Deploy action runner on same server as Gitea
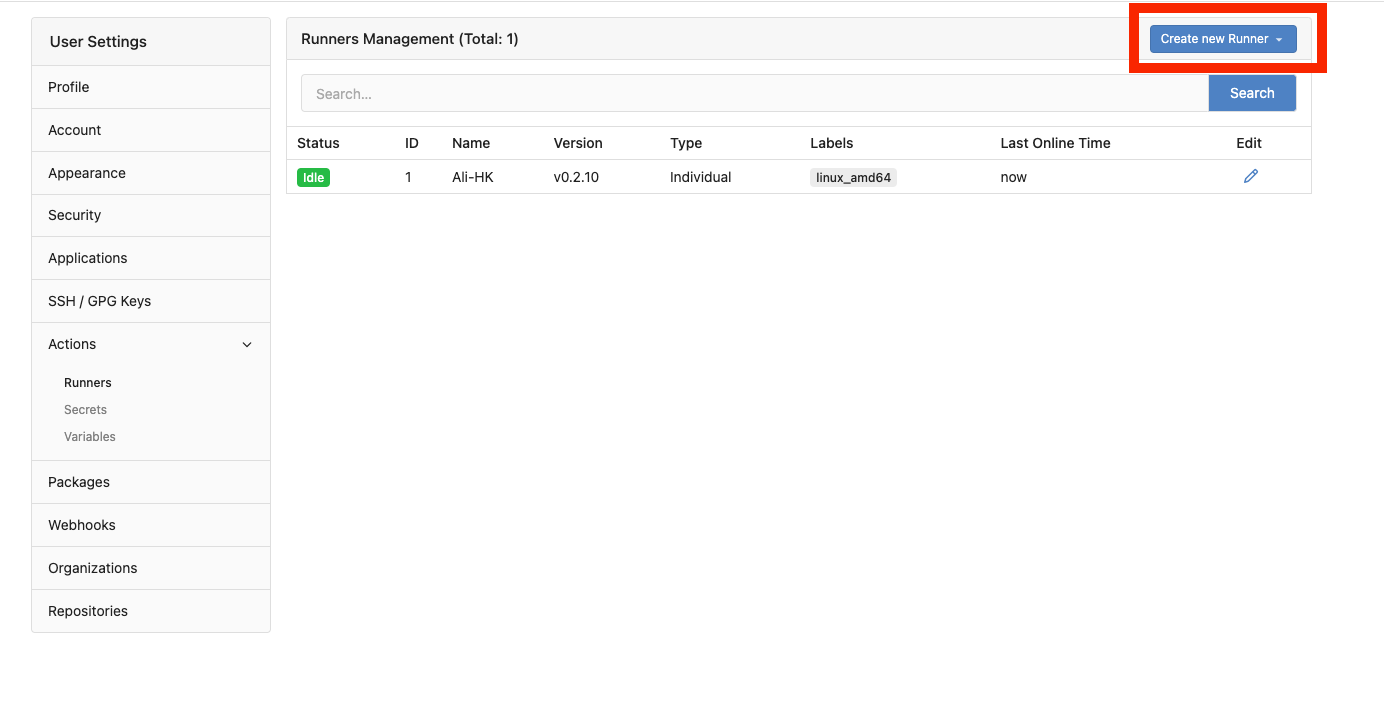
- First, go to your Gitea user settings UI, and create a new action runner key
Download the latest action runner of any version you like from official release page. As git repo file owns to user git, and in new version of git command, only the same ownership can run git clone (unless you upload your ssh public key to Gitea to grant access shown below), it is recommend to run action runner using user git.
1
2
3
4
5
6
7
8
9su - git
mkdir gitea_actions
cd gitea_actions
wget https://dl.gitea.com/act_runner/0.2.10/act_runner-0.2.10-linux-amd64
mv act_runner-0.2.10-linux-amd64 act_runner
sudo chmod +x act_runner
./act_runner generate-config > config.yaml # Then input coressponding info
./act_runner --config config.yaml register # In new version 0.2.11, you need to register by running this command
vim config.yaml # edit the labels if you did not input label before1
2
3runner:
labels:
- "linux_amd64:host"The label of runner is very important. If it leave as default, the runner will runs in docker, which is not convenient for us to build blog static file with hexo, so we need the runner runs locally. So we need to set it as “linux_amd64:host”. The label will determine whether runner runs in docker or local. For more details, just go to and read official document.
1
2
3su - git
cd gitea_actions
nohup ./act_runner -c config.yaml daemon &Then go to Gitea runner web page, you will find your runner online.
Deploy action runner on another server
The biggest difference here is that we need to grant access to remote repo as the git user in other server does not have access to a private repo. For safety concern, I only give read permission to another server holding action runner.
Log in the server you want deploy action runner as user git
1 | ssh-keygen -t ed25519 # generate a new ssh key for git |
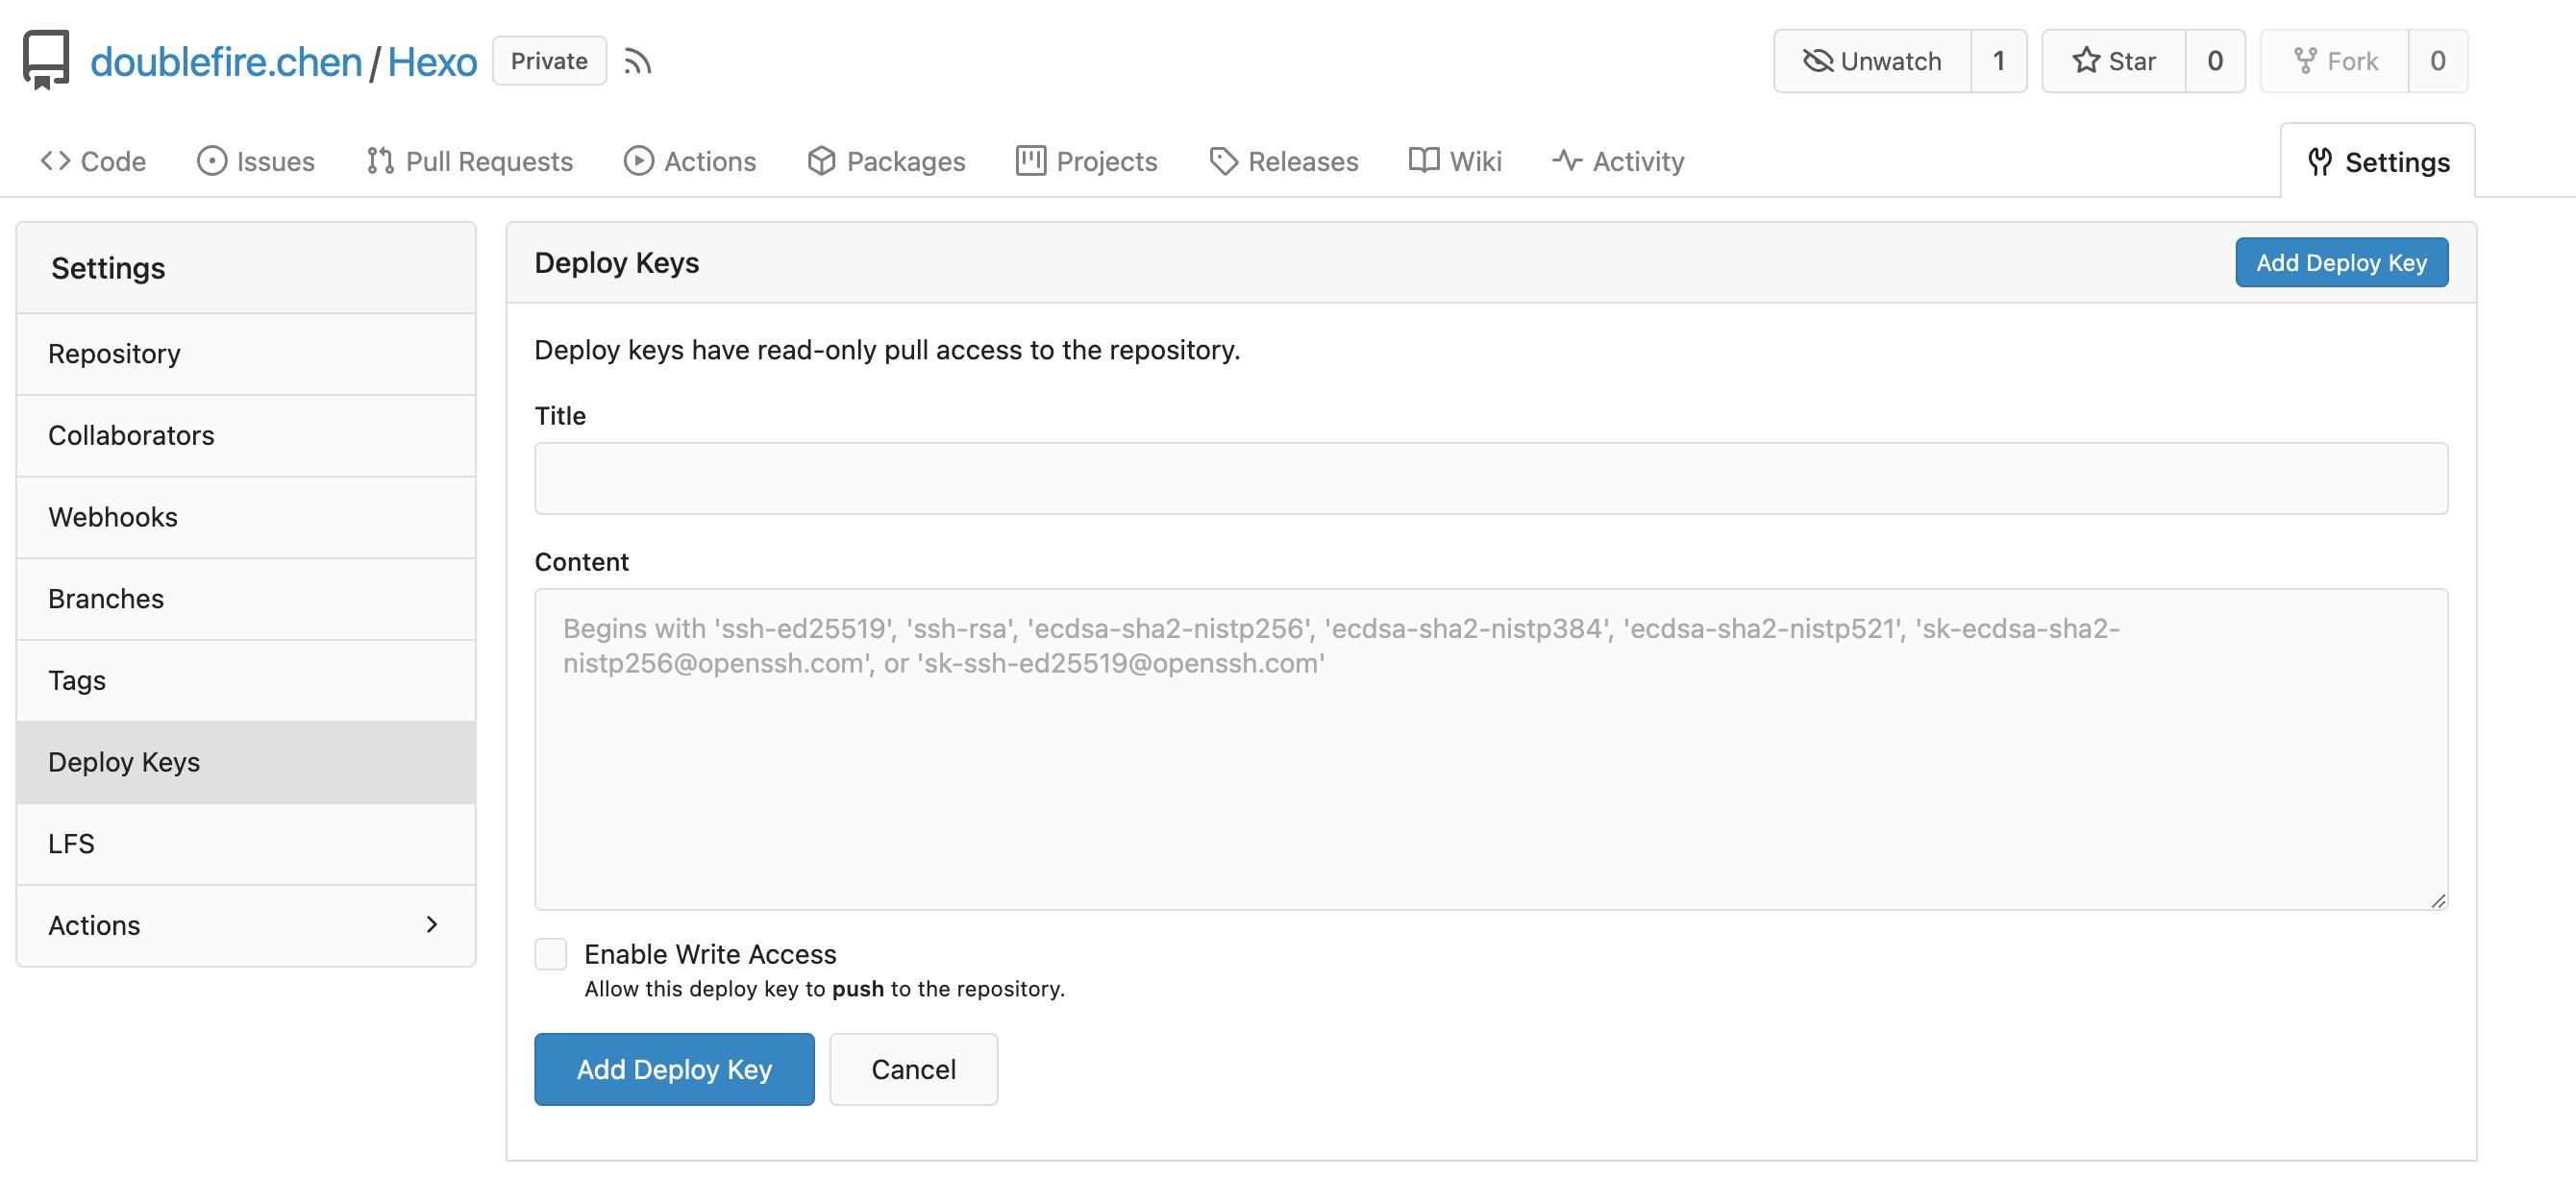
Go to your repo webpage and create a new deploy keys using your ssh public key. Other steps is the same as before.
Install hexo for user git
1 | su - git |
Deploy actions in your blog repo
At first, maybe you need to delete the hook in Gitea server if you deploy your blog following my old tutorial. The path is /var/lib/gitea/data/gitea-repositories/doublefire.chen/hexo.git/hooks/post-receive.d/post-receive, just delete or make it empty.
Open your terminal locally and switch to your blog repo.
1 | mkdir .gitea |
1 | name: Blog CI & CD |
Configure your web server
I am using nginx so I will give a example of nginx.
Log in your Gitea server as root.
1 | apt update |
1 | server { |
1 | sudo certbot certonly --nginx -d aka.cy |
Then, you can just write and commit, push to remote Gitea server, and the Gitea actions will build and deploy your blog automatically.
Reference
- https://blog.shipengx.com/archives/2577fd4c.html
- https://gitea.com/gitea/act_runner
- https://stackoverflow.com/questions/76998107/can-i-run-gitea-actions-witout-docker
- https://docs.gitea.com/next/usage/actions/act-runner#labels
- https://hexo.io/zh-cn/docs/commands#generate
- https://docs.gitea.com/usage/actions/act-runner